Halloween Cookie Treats
Halloween is by far one of my favourite Autumn events. As the darkness arrives earlier each day, I like to bake delicious treats and cook heart warming meals. Days gone by I would always make sure I had my Pumpkin scooped out and carved with an intricate design. Illuminating my window sill, it would let ‘trick or treaters’ know they were welcome at my door. Little did the poor unsuspecting little monsters know I'd lie in wait wearing my spectacular Wolf mask. Many a young ghoul went running from my doorstep in terror, so I soon had to give up such activities.
Seasonal Baking
Nowadays I like to prepare tasty homemade treats for the vistitors at my door on Halloween. Baked and decorated treats are not only good for handing out to tiny monsters calling at your door but also a great way of getting children involved with seasonal events and baking but also making homemade treats for their own Halloween party.
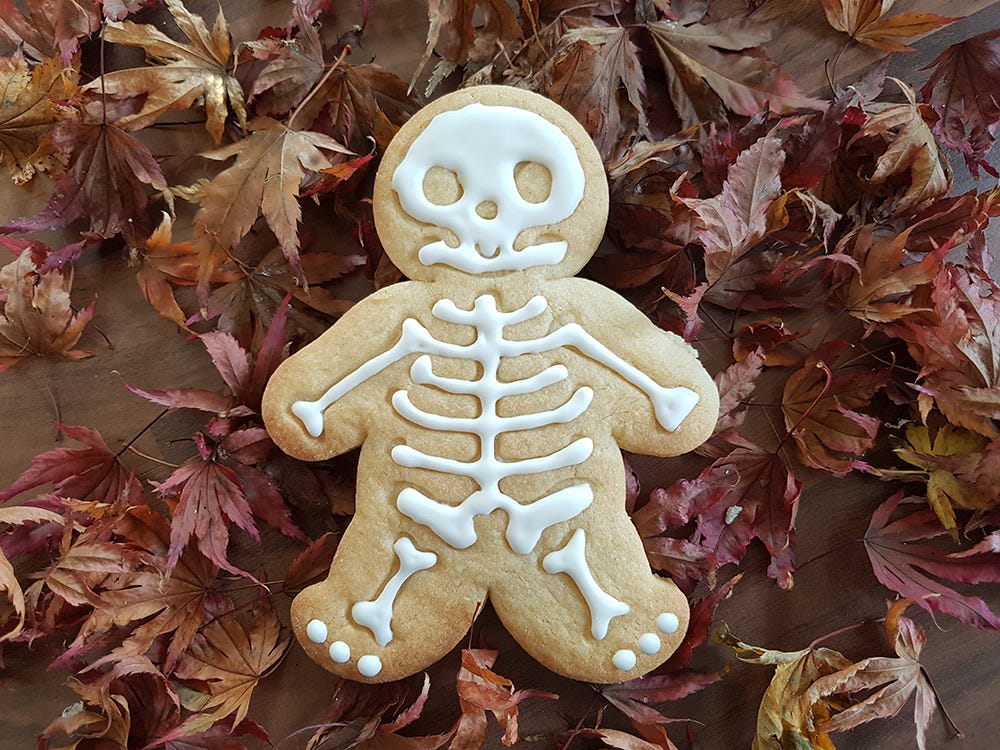
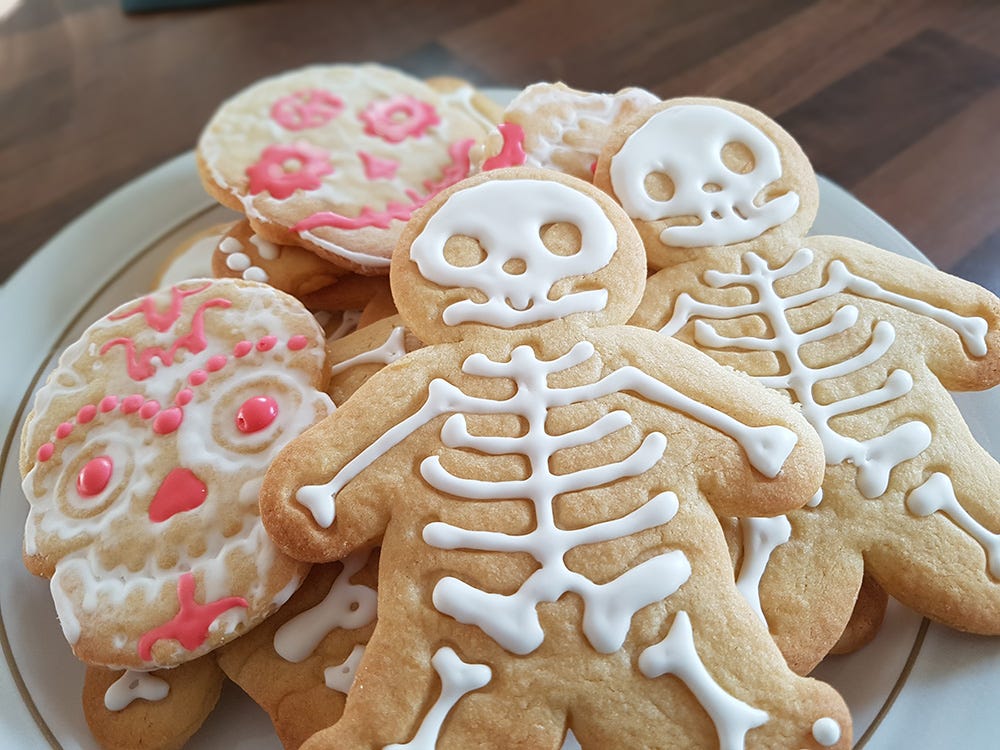
In the Fred section of our website there are some great themed cookie cutters ideal for Halloween treats, the Fred Gingerdead Cookie cutters make a skeleton gingerbread man, this kit includes one combination stamp/cutter. One side has the imprint stamp of a skeleton and the other cuts the gingerbread man out.
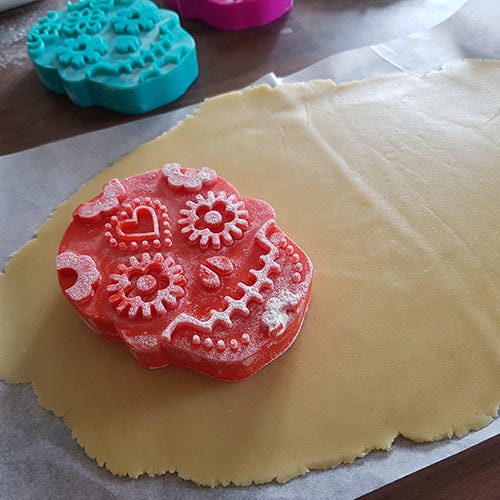
There is also a set of 4 cookie cutters called Fred Sweet Spirits, these cutters are multicoloured and feature 4 different patterned skull designs as seen in the day of the dead festivals around the world. This set also has a stamp for the pattern and the cut out shape all in one. Both cookie sets are complete with various recipes and methods for making delicious cookies. Here I have prepared some extra tips for baking delicious cookies.
Top Tips
- Preheat your oven to 180°C.
- Using either a hand or stand mixer blend together the butter and sugar to a smooth paste, then add the egg, making sure it is mixed well. This makes it easy for when adding flavours throughout the mixture evenly.
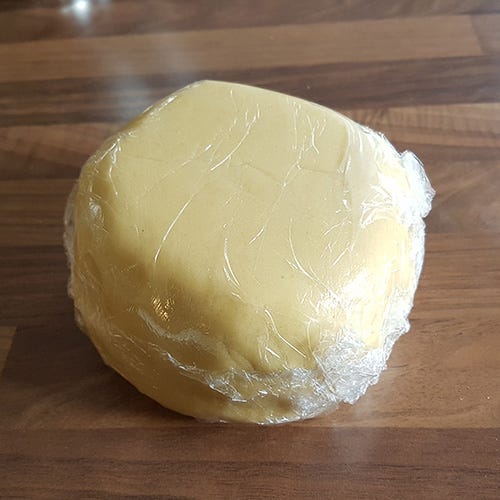
- Add the flavourings and other ingredients as per recipe variety. As you get to the end of adding all of the ingredients the mixture will become more difficult to mix. At this point work the dough with clean hands on a work surface and form a smooth ball shape.
- Wrap the dough in cling film and rest in the fridge for at least half an hour. Remove your cookie dough from the fridge and cut into 4 pieces. Roll out each piece between 2 pieces of baking parchment until it is flat and an even thickness.
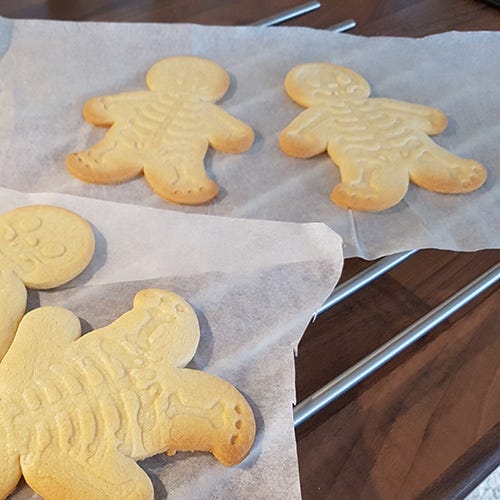
5. Use the cookie cutter to cut and stamp out your shape on the baking parchment. Remove all the excess dough and reform into another ball. Place the baking parchment flat onto a baking tray or baking sheet and bake for 8-10 minutes depending on the size of the cookie. Remove from the oven with an oven glove as the cookies brown on the edges and leave to cool completely on a cooling rack.
Royal Icing
Once you cookies are cooled you are free to decorate them. The stamp will have left an impression in the cookie dough for icing guidelines. Royal icing lends itself to different consistencies and colours for decoration. I used the recipe as follows... 450g icing sugar, sifted 2 large egg whites 1 - 2 tablespoons water The water allows you to adjust the consistency for different icing styles. Icing that is the same consistency as tooth paste is perfect for outlining a shape and a wetter mixture is better for flood icing to fill in between the outlines when dry. Use a minimal amount of colour on a toothpick for changing the icing colour in a separate bowl.
For icing cookies you may like a few simple accessories, some you may already have at home. Toothpicks as previously mentioned are ideal for adding tiny amounts of colour to the icing but are also useful to help move the icing into a intricate design. Icing bottles allow different colours of icing to be applied easy and stay fresh until you are ready to use them.
-
 Mason Cash Colour Mix S18 Powder Pink Mixing Bowl 26cm£22.40
RRP: £32.00


